How to Add Image on Art Board in Adobe Photoshop
You can think of an artboard as a special type of layer grouping created using the Layers panel. Its functionality might not be as intuitive in Photoshop as it is in Adobe Illustrator, but with a little practise you lot should go the hang of information technology. Follow these steps to encounter how you can make artboards on your own:
- In this example, a new document is created using the iPhone 6 start document. If you are starting a new document with the legacy New Document window, create a new file with these dimensions: 750 broad x 1334 high.
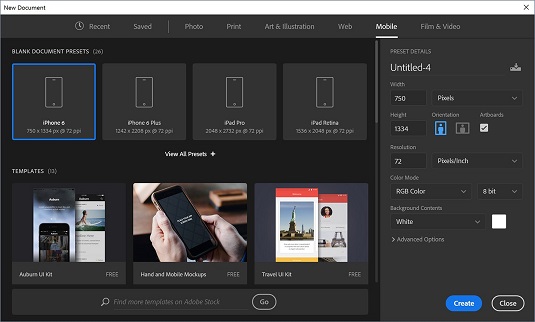 Create a certificate the size of the iPhone half dozen.
 - If you created your new document with the iPhone 6 commencement file, you already see an artboard listed in the Layers panel.
 The Layers console with an Artboard already created.
 - If you lot don't see an artboard, create one now past choosing New Artboard from the Layers panel menu.
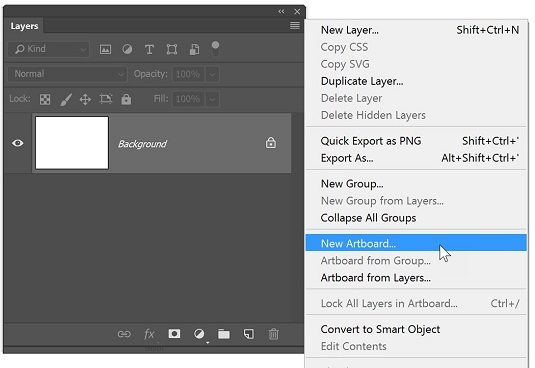 You tin can add your own Artboard using the Layers console menu.
While creating artboards, you can choose from a broad multifariousness of preset sizes or define your own custom artboard size.
- Choose File→ Identify Embedded and navigate to the Book03-Photoshop folder. Double-click to select the image named water_sky or select the prototype and press Place.
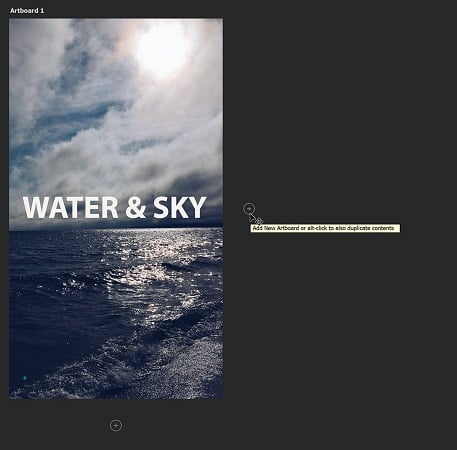
- When the image appears on the artboard, grab ane of the corner handles, hold down the Shift primal and click and drag outward in order to scale the prototype and fill the unabridged artboard. When the image is sized and positioned, select the Commit checkbox in the Options bar, or press the Enter key to confirm the placement of the image.
 Place an image and stretch information technology to fit the entire artboard.
Next, you lot add a text layer.
- Select the Type tool and click and drag on the artboard in society to create a text area and add a new text layer.
- Type the text, WATER & SKY. Using the controls in the Options bar, ready the type to the post-obit properties:
- Font: Myriad Pro Assuming
- Size: 110 pt
- Color: White
- Select the Commit button in the Options bar after you take set your type.
 Add a text layer to your artboard.
You can printing Ctrl+Return (Windows) or ⌘ +Render (Mac) in club to commit a blazon layer as well.
Calculation additional artboards
You tin can also create additional artboards. Possibly you desire a multi-screen mobile app created in Photoshop, or y'all simply want to create multiple versions of ane screen. For these instructions, you continue with the project started above.- Click on the Movement tool and select the hidden Artboard tool.
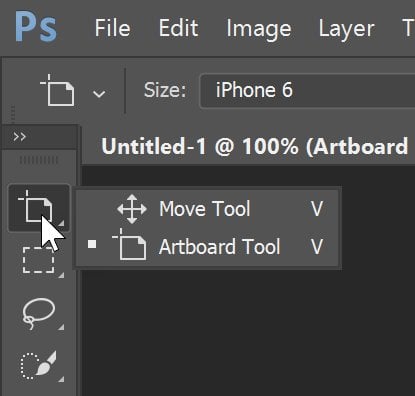 Use the Artboard tool to manipulate the artboards and create more than.
Plus sign icons appear on all sides of the artboard. You lot can click on these plus sign icons in order to add additional artboards.
- Click the plus sign icon to the right of your existing artboard to run into that a new blank artboard is added.
 Add a blank artboard by clicking on the plus sign icon.
Take a wait in the Layers panel. Ensure that, just like layers, the newest artboard appears to a higher place the selected layer.
Naming your artboards
Before this file becomes more than complex, information technology would be wise to name the artboards. This is done in the Layers panel.- Select the initial artboard (Artboard 1) and double-click on the artboard name. When the textbox is active, type the name Home.
- Double-click on the name Artboard 2 in the Layers panel and name this layer Beach.
Calculation content to the second artboard
At present, add an image and some text to the second artboard:- Click on the Artboard tool and switch it dorsum to the Move tool.
- Make sure that the Beach artboard is selected in the Layers panel and choose File→ Place Embedded. Navigate to the Book03_Photoshop folder and select the image named Beach and press Place. The image is added to the second artboard.
- As with the last paradigm you placed, hold downwardly the Shift central and Shift elevate on a corner point in order to proportionally scale the image larger and fill the screen.
- With the Move tool active, click and drag the image. Note that even though it is in the same document, it does not overlap or interfere with artwork on other artboards.
Cloning from one artboard to another
At present, clone the text from the Abode artboard to the Beach artboard:- With the Move tool still selected, Ctrl-click (Windows) or ⌘ -click (Mac) on the H2o & Sky text in the Home artboard. This activates that layer.
- Concur down your Alt (Windows) or Option (Mac) cardinal and click and drag the text from one artboard to the next.
If you lot hold down the Shift key while dragging the image will remain aligned.
- Switch to the artboard and double-click on the newly cloned text to activate the text area and type FUN BEACHES.
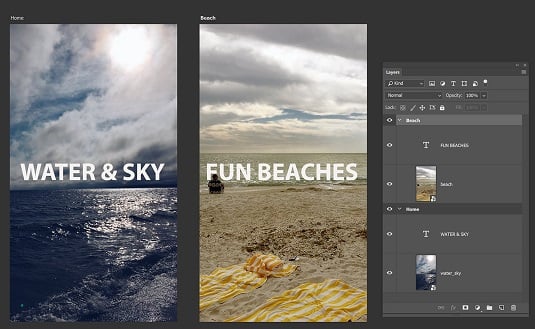 A Photoshop file with 2 artboards.
Moving elements from one artboard to another
To movement an element from ane artboard to another, simply drag the elements from ane artboard to another. When you move an element between artboards, Photoshop tries to position it in the aforementioned location relative to the ruler origins located in the upper-left corners of the artboards.Exporting your artboards
Y'all can salvage your file as a Photoshop file to maintain layers, merely in this example yous volition export the file every bit a two-page PDF. Or, use the File→ Consign characteristic in order to consign your artboards as PNGs, JPEGs, PDFs, and more.Nigh This Commodity
This commodity can be found in the category:
- Full general (Adobe Products) ,
schillingermoderfe1965.blogspot.com
Source: https://www.dummies.com/software/adobe/adobe-creative-cloud/working-artboards-photoshop-cc/
0 Response to "How to Add Image on Art Board in Adobe Photoshop"
Post a Comment